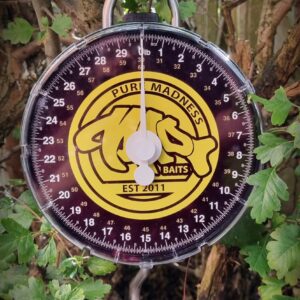
Description
Please do not order this worksheet. It is only available to view in this listing. Follow the following steps to easily change the dial. You will need a flat blade screwdriver that will fit into the clips on the sides of your clear lid. you’ll also need three small items to wedge into the holes to prevent the lid from clipping back into place (pen tops are ideal as seen in the pics)
The process will take around 5 mins, take your time and assert controlled pressure.
- 1. Hold your Scales by the handle and zero.
- 2. Push the screwdriver blade into any clip on the side of the clear lid. Apply controlled pressure and lift up, slide a pen top under the lid and into the hole. (this prevents the lid clicking back into place when you remove the screwdriver).
- 3. Continue the same process around the other clips in turn, after about 3 clips the clear lid should come free. You can now remove the pen tops , these are now done with.
- 4. Carefully wiggle the dial needle from side to side whilst applying upwards pressure and remove (it may be stiff but it will eventually come free.
- 5. The next thing to do is to remove your original dial plate.
- 6. At the bottom of the dial in the 6 o clock position is a cut out tiny square on the plate, lift this up with the pen top and start to turn the plate to release it from the square which is situated in the centre of the dial.
- 7 Remove the old dial plate.
- Now you going to fit the new plate by reversing the above process.
- 8. Place the new plate over the square in the centre of the scale and twist into place so that tiny cut out square aligns and clicks into place in the 3 o clock position.
- THE NEXT STEP IS IMPORTANT
- 9.Take the weigh needle in your hand and lift up the scales by the handle (as if you were weighing a fish) place the weigh needle into position at the 12 o clock position on the scale. (This process of lifting the scale at the beginning and end ensures the correct weight was never changed during the changeover of plates)
- 10. Take the clear lid and position it aligning all the clips and firmly push the clips one by one back into position.
- Your scales are now ready to use…ALL DONE….BE LUCKY


Reviews
There are no reviews yet.